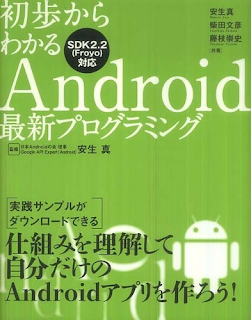
とある企業の一次選考の帰りに、ジュンク堂へと立ち寄り、あれこれ物色していたらこんな本を見つけた。
 |
| 『初歩からわかる Android 最新プログラミング』 ¥2,800 (税別) |
ちょうど Android のお勉強の教材を探していたところだった事もあり、1時間ほど迷った挙げ句、思い切って買ってきてしまった。
前回ですでに開発環境は導入済みなので、第 2 章から攻略していこうと思う(本の内容をただなぞっているだけなので、解説というよりは実況中継になるが)。
※ 上の本では Android 2.2 を前提に解説されているが、ちょっと欲張って 2.3.3 で試した。
そのため、ところどころ本の内容とは異なる箇所がある。
あれこれ考えるよりも、手を動かす事を優先。まずは本に書いてある通り CheckDateTime という名前でプロジェクトを新規作成。その際、いくつかのファイルが自動的に生成された。
それらの中には、Android アプリの GUI を司る XML ファイル main.xml も含まれている。これを Eclipse で開くと、こんな感じで何やらビジュアル的な画面が現れた。
 |
| Eclipse で main.xml を開いたところ |
左側にはボタンとかがいっぱい用意されていて、ドラッグ & ドロップで画面に配置していけるらしい。
 |
| ボタンをドラッグしているところ。 |
これで画面にボタンが(なぜか左上に)追加された! やった!
 |
| ボタンが追加された! |
すると、ボタンが画面中央に移動した。
思い通りの位置にボタンを配置するには、ちょっとした慣れが必要そうだ。 NetBeans に標準装備の GUI ビルダーとは程遠い使い勝手である(が、NetBeans を知るつい最近まで、ぼくはソースコードベタ書きで GUI を構築していたので、それよりは多少マシだと感じた)。
この時点で、main.xml の中身は以下の通り(ちょっと改行したりはしたけど)。
ざっと目を通すだけでも、何となく個々の要素の意味がわかる。
<?xml version="1.0" encoding="utf-8"?>
<LinearLayout
    xmlns:android="http://schemas.android.com/apk/res/android"
    android:orientation="vertical"
    android:layout_width="fill_parent"
    android:layout_height="fill_parent"
    >
<TextView
    android:layout_width="fill_parent"
    android:layout_height="wrap_content"
    android:text="@string/hello"
    />
<Button
    android:layout_height="wrap_content"
    android:text="Button"
    android:id="@+id/button1"
    android:layout_width="wrap_content"
    android:layout_gravity="center_horizontal"
    android:gravity="center_horizontal"
    />
</LinearLayout>
これを以下のように修正。
<?xml version="1.0" encoding="utf-8"?>
<LinearLayout
    xmlns:android="http://schemas.android.com/apk/res/android"
    android:orientation="vertical"
    android:layout_width="fill_parent"
    android:layout_height="fill_parent"
    >
<TextView
    android:layout_width="fill_parent"
    android:layout_height="wrap_content"
    android:text="@string/hello"
    android:id="@+id/dateTimeDisplay"
    />
<Button
    android:layout_height="wrap_content"
    android:text="現在時刻を確認"
    android:id="@+id/whatTime"
    android:layout_width="wrap_content"
    android:layout_gravity="center_horizontal"
    android:gravity="center_horizontal"
    />
</LinearLayout>
TextView や Button の ID "@+id/xxxxx" のうち、xxxxx の部分は、後で Java から参照される TextView や Button の名前となるそうな。ふむふむ。
この変更が、実際の画面にどう反映されるのかを確認。
ご覧の通り、ボタンのラベルが変更された。
いよいよ Java を弄る。
自動的に生成された CheckDateTime.java は、こんな感じになっている。
package com.tercel_tech.checkdatetime;

import android.app.Activity;
import android.os.Bundle;

public class CheckDateTime extends Activity {
    /** Called when the activity is first created. */
    @Override
    public void onCreate(Bundle savedInstanceState) {
        super.onCreate(savedInstanceState);
        setContentView(R.layout.main);
    }
}
ここに色々と付け足してアプリを作り上げていくのだという。
まずはさっきの TextView と Button を使用可能にするため、private フィールドに宣言(そして、 Ctrl + Shift + o で、しかるべきパッケージを import)。
package com.tercel_tech.checkdatetime;

import android.app.Activity;
import android.os.Bundle;
import android.widget.Button;
import android.widget.TextView;

public class CheckDateTime extends Activity {

    private TextView myDateTimeView;
    private Button myShowDate;

    @Override
    public void onCreate(Bundle savedInstanceState) {
        super.onCreate(savedInstanceState);
        setContentView(R.layout.main);
    }
}
次に、アプリ起動時に実行される onCreate メソッドの中に myDateTimeView と myShowDate の初期化処理を書く。また、現在の時刻を表示するメソッド showCurrentDate も追加する。ぼくは Java のコーディングにはほんの少しだけ心得があるので、割と本の内容にビビらずスムーズにプログラムを書いていけたと思う。
package com.tercel_tech.checkdatetime;

import java.text.SimpleDateFormat;
import java.util.Date;

import android.app.Activity;
import android.os.Bundle;
import android.view.View;
import android.widget.Button;
import android.widget.TextView;

public class CheckDateTime extends Activity {

    private TextView myDateTimeView;
    private Button myShowDate;

    @Override
    public void onCreate(Bundle savedInstanceState) {
        super.onCreate(savedInstanceState);
        setContentView(R.layout.main);

        myDateTimeView
            = (TextView)findViewById(R.id.dateTimeDisplay);
        myShowDate
            = (Button)findViewById(R.id.whatTime);

        // ボタンが押されたら……
        myShowDate.setOnClickListener
                (new View.OnClickListener() {
            public void onClick(View v) {
                // 現在の時刻を表示
                showCurrentDate();
            }
        });
        showCurrentDate();
    }

    // 現在の時刻を表示するメソッドだよ!
    private void showCurrentDate() {
        SimpleDateFormat sdf =
            new SimpleDateFormat
                ("yyyy.MM.dd '/' hh:mm:ss a zzz");
        Date currentTime = new Date();
        myDateTimeView.setText(sdf.format(currentTime));
    }
}
これでひとまず完成らしい。
やはり使い慣れた環境なだけあって、思った以上にスムーズに作れた。
これを実際に実行してみよう。レッツビルド!
 |
| どきどき。 |
 |
| わくわく。 |
 |
| お! |
 |
| キタ━━━━━━(゚∀゚)━━━━━━!!!! |
 |
| ちゃんとボタンも押せる! |
やった! できた!
はじめての Android アプリだ!! ショボいけど!!!


